
So, how do I go about establishing a new photography course?
Pedagogy
Before you get stuck into the shopping list it might be a good idea to start with a review or reflection with the staff who will teach the new course about what your expectations of the course will be:
Once you have done some initial thinking about the type of photography course you (and your colleagues) want to teach, you'll need to consider issues such as equipment, running costs and space. Let's look at these issues in turn:
- Classroom culture - What it will 'feel' like to be a photo student?
- Ethos - What type of learning will you promote? What affordances, experiences, opportunities will your course provide for students?
- Type of work - Will your emphasis be on photography as a vocational set of skills, a craft, a critical tool or a branch of the arts?
Once you have done some initial thinking about the type of photography course you (and your colleagues) want to teach, you'll need to consider issues such as equipment, running costs and space. Let's look at these issues in turn:
Equipment
|
The set up costs for a photography course can seem frightening but there are ways of maximising the benefits of your financial investment. Once you know how much you have to spend, consider the following items:
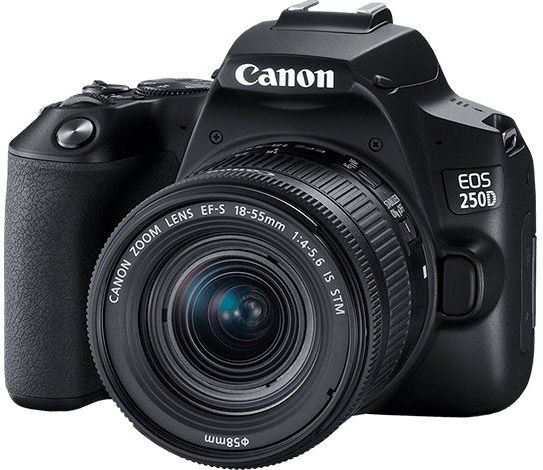
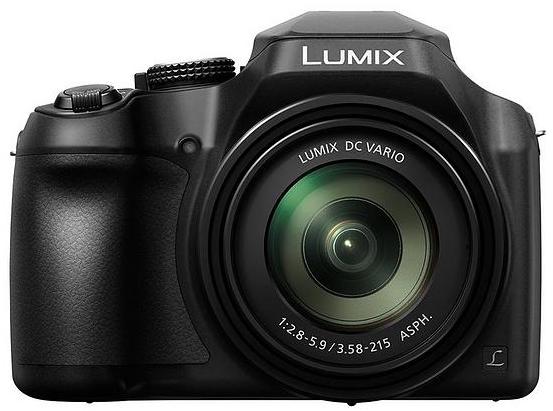
Cameras and lenses - The choice between DSLR, point and shoot, iPod/iPad or even film cameras will depend on the decisions you've already made about pedagogy but also on the age of the students (Key Stage 4 or 5) and the policies about devices in your school. For example, if students are allowed to use mobile phones or personal devices or have ready access to their own cameras this can significantly reduce potential costs. Entry level DSLRs (like the Canon 250D or Nikon D3500) are now comparable in cost to some point and shoot cameras but they can be quite delicate and prone to malfunction if treated roughly. Of course, they come into their own with the use of a range of lenses - prime, telephoto, macro etc. The main advantage of a point and shoot or bridge camera (like the Panasonic Lumix DMC-FZ82 or Nikon Coolpix B600) is its adaptability and, of course, cost. If your students don't have access to computers you may want to consider iPods/iPads since these devices combine the ability to take, edit and share digital photographs. This solution would suit a course that was specifically designed to take advantage of an entirely digital set up (more details on this below). Peripherals - Don't forget to factor in the cost of camera bags, SD cards, tripods and USB leads. It always pays to have some spares! |
|
Lights and backdrop - If you have access to even a small space in your classroom or stock cupboard, a few decent lights and a backdrop will enable you to create some impressive portrait and still life shots.
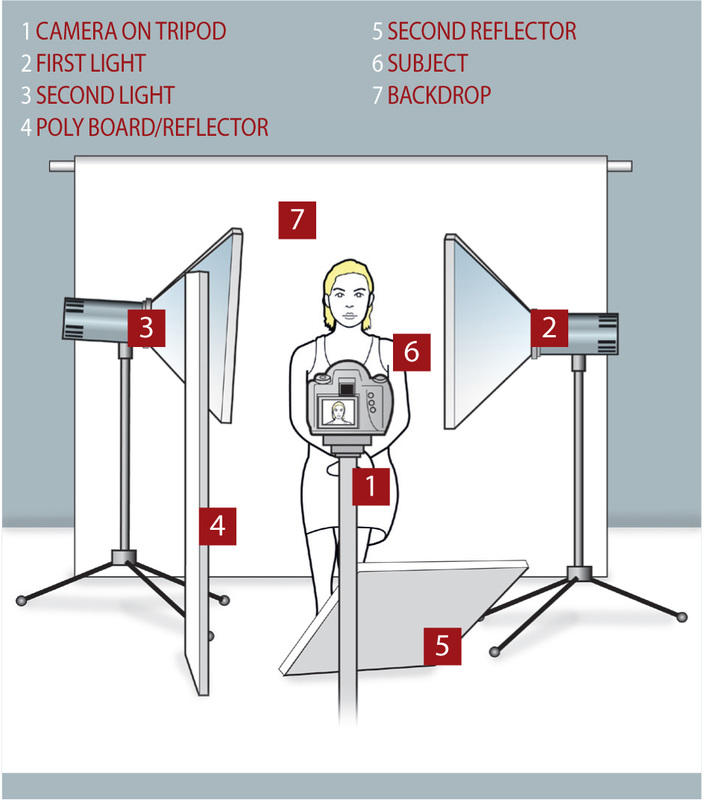
Image courtesy of Digital Camera World
|
This two light set up makes great use of reflective panels to bounce the light from the soft boxes to create a variety of lighting effects in a small space. If you can't afford a professional backdrop set up, there are plenty of online tutorials with advice for making your own (why not get the DT department to help you out?) You can event make your own light stands and soft boxes. Why not get the students to help?
ICT and printingComputing and printing - One important decision to be made is how you want the students to document their work. Traditionally, teachers have used the sketchbook model, derived from practice in Art & Design. It's fair to say that this approach suits some students more than others and is a separate skill in itself. It also requires lots of printing which is costly and time-consuming (imagine 20 students each attempting to print a 30+ image contact sheet after a photo shoot). The alternatives to a physical sketchbook include:
|
There are advantages and disadvantages to each of these methods. It used to be the case that making a blog or website was beyond the abilities of most students. However, blogging sites like Tumblr, Wordpress or Blogger and online web design services like Google Sites, Wix and Weebly have made the business of web design accessible for all. You could even decide, as some schools do, to keep all documentation and record keeping online, creating an entirely digital infrastructure for your course. You might even want to create your own department website using the same system as the students, modelling good practice and solving potential problems together. Google Drive or Office 365, along with other cloud based solutions, mean that you are not necessarily bound to your school's network for storing large files. It would be worth checking the speed and reliability of the school's Internet connection before you decide whether or not to go too far down the digital route!
As for printing, you will always need to print some things - course documents, worksheets, students' final outcomes - even if you decide to go digital. You will need to discuss printing options with your school's network manager. Your requirements here will be determined by several issues:
Laser printers are quick and great for high volume printing. Ink jet printers produce better quality images but are slower, relatively expensive to run and not as robust. Will your printer be networked (and able to cope with wireless printing) or will it run from a stand alone computer? One thing to remember is that online printing by demand is now relatively cheap, quick and high quality. Services like Photobox are almost as cheap as printing your own images. The turn around is swift and the quality very high. This solution might be best for those large, exhibition prints for final outcomes.
As for printing, you will always need to print some things - course documents, worksheets, students' final outcomes - even if you decide to go digital. You will need to discuss printing options with your school's network manager. Your requirements here will be determined by several issues:
- the volume, speed of printing you require
- the quality of the images
- the range of media you expect to be able to put through the printer
- the reliability and running costs of the printer
Laser printers are quick and great for high volume printing. Ink jet printers produce better quality images but are slower, relatively expensive to run and not as robust. Will your printer be networked (and able to cope with wireless printing) or will it run from a stand alone computer? One thing to remember is that online printing by demand is now relatively cheap, quick and high quality. Services like Photobox are almost as cheap as printing your own images. The turn around is swift and the quality very high. This solution might be best for those large, exhibition prints for final outcomes.
Darkroom
If you are lucky enough to have access to a darkroom (even if this is just a cupboard) you'll need to shop around for some basic equipment and chemicals. There's nothing quite like the magic of the darkroom for watching images emerge in the developer and teaching students about how light behaves. Even if you don't plan to use manual cameras and film, you can still have lots of fun creating photograms and chemigrams. Consider using Freecycle, buying second hand equipment or contacting other local schools and colleges who may be giving away their darkroom equipment.
If you don't have access to a darkroom you can still teach students the basics of photography and the behaviour of light in the following ways:
If you don't have access to a darkroom you can still teach students the basics of photography and the behaviour of light in the following ways:
- Create simple camera obscura using cardboard tubes or a shoebox, greaseproof or tracing paper, simple lenses or even tinfoil (and a bit of duct tape).
- Consider turning your teaching room into a camera obscura by blacking out the windows and creating a small hole to let in a sharp beam of light. This works well in the summer and is a magical experience which puts students inside a camera. Check out the images created by Abelardo Morell using this technique.
- Get your science technicians to help you order the chemicals to make cyanotypes. These are readily available in chemical catalogues and can be mixed up to create a solution which, when brushed onto paper, creates a photosensitive surface. There is not need for a darkroom and the exposed prints can be developed simply by washing them in running water.
- Experiment with creating chemigrams inspired by the work of Pierre Cordier.
- Create simple, drink can pinhole cameras designed to capture the passage of the sun through the sky over several weeks/months (a solargraph). The resulting images can be scanned once they have been taken out of the cameras.
Consumables
Finally, don't forget those all important consumables, the things you'll need to replace year on year: stationery, mount board, tape (various), light bulbs, craft knives etc.
If you have any questions about setting up your new photography course, please get in touch. Good luck!